Monday, July 13, 2015

Hello All, 
Just one quick little post to tell you that I will not be updating this blog for the foreseeable future. For shop updates, events, and class listings please visit my website at http://copperheartdesigns.com
If you would like to contact me you may do so through my website's contact form or via email at copperheartart@gmail.com
There's still lots of useful info here so feel free to have a look around! Ta-Ta! 

Monday, March 30, 2015

Updated Class Listings

Hi everybody! Looking to learn some new skills? I have updated my classes page with all of my upcoming class offerings at Wheelhouse Studios (formerly Mini-Courses) at Memorial Union in Madison, WI.  We are offering classes in wire wrapping, polymer clay, enameling, and etching. Check out the online catalog and registration for more!

Monday, November 3, 2014

SALE at Copperheart Designs!


Happy November everybody! 
I am closing out my colored etched copper and brass jewelry. Lots of great earrings and necklaces on sale 50% off. Check out the SALE section of my etsy shop. 

Tuesday, September 23, 2014

Free Shipping at CopperheartBeads


To celebrate the opening of my new shop, I am offering free shipping on orders of $10 or more at CopperheartBeads. Just use coupon code WELCOME for free shipping un
til October 31st.

Monday, September 22, 2014

Introducing CopperheartBeads

I'm pleased to announce the opening of CopperheartBeads, my new supply shop on Etsy. At CopperheartBeads you will find beads and supplies all handmade by me, including etched copper beads, enameling copper beads, and polymer clay beads. I will be adding more varieties and styles so be sure to check back often!

Saturday, March 29, 2014

A Foray into Polymer Clay

As I mentioned in a previous post, I am taking a little hiatus from enameling and metalsmithing. In the meantime, I have been playing around with polymer clay. I have dabbled in polymer clay in the past, but this is the first time I have really concentrated on it, and I am just finally starting to put together some pieces that I like. I mixed my polymer clay beads with some metalwork and wirework elements, and a few Czech glass beads in the blue and green necklace. Of course I have always loved beads so the best thing about working in polymer clay is the opportunity to make my own beads! These are a few of the pieces I have made so far. I will probably be putting some up in the etsy shop soon.


Thursday, January 30, 2014

Necklaces on Sale and Other News


In honor of my least favorite time of year (only two months of winter to go!) I am having a little sale in my Copperheart Designs online shop. All brass and copper necklaces with colored finishes are on sale at 25% off! I have lots of colors, styles and lengths to choose from. Why not buy yourself (or your valentine!) something pretty!

In other news, I am taking a hiatus from enameling, etching, and soldering as well as showing at craft fairs while I work on (ahem) a very special "project." I will still be busy doing some cold work and dabbling in polymer clay, and I will still be managing my shops and processing orders. Everything in my shops is made and ready to ship, so shop away!

Monday, November 25, 2013

Newly Updated Shop and Holiday Sale!


I've been hard at work updating my own online shop with a new, prettier and more streamlined storefront. To celebrate, I am having a holiday sale, with all brass and copper earrings on sale for $10 off. I also have hypo-allergenic ear wires available for those with sensitive ears.

Sunday, September 8, 2013

The World's Smallest Metalsmithing Studio

A while back I mentioned on facebook that I have been working on cleaning/organizing my studio space, and I promised a picture when it was all done. Now I should point out that I use the term "studio" very loosely because my work space is actually... a coat closet, with the linen closet around the corner for additional storage.  Now this isn't the best photo because this closet is in a hallway, but I thought it might be helpful to other metalsmiths working in small spaces and apartments to see how I set it up.


So you can see that I have a very small bench in there. It's actually a portable bench that sits on a folding stand. There's a narrow space alongside the bench so I got one of those inexpensive rolling shelves to hold additional tools next to my bench. I have a hanging shoe organizer on the door to hold various frequently used tools and supplies, and drawer bins on the shelf above to hold materials. The closet bar comes in handy for keeping saw frames and safety glasses readily at hand. You can also see where I used my little mini-vise as a jury-rig clamp to hold the front of my poor little bench together. I should probably fix that so I can use my vise for its intended purpose again! Probably still looks a bit messy to some but for me this is really clean! I should probably add that I don't do any soldering or enameling in the closet. I do that on the stovetop where I have a little additional ventilation rigged up. I also avoid toxic chemicals in my work to reduce hazards associated with working in my living space.  All in all it's not so bad. My old apartment had a butler's pantry. Now THAT was a studio space, but a coat closet is better than nothing!


Monday, August 19, 2013

Craft Fair Booth Makeover

This is my third season selling my wares at craft fairs, and I decided it was time for a booth makeover. I remember my first craft fair, I just had tables with white covers and jewelry displays sitting on the tables. It was pretty dull. Since then I have looked at a lot of booth shots, checked out a lot of craft fairs, and made a number of changes to my set-up. In all of my research and trial-and-error, the best piece of advice I came across was to think of a craft fair booth as a tiny pop-up store. How would you decorate your own brick and mortar shop? Keep those ideas in mind as you design your booth space.

My goals in designing my booth space were to:

  • Have a coherent color scheme
  • Create a welcoming space with room for shoppers to come in off the walkway
  • Incorporate the entire space into the design of the booth, including the walls of the tent and the ground. 
  • Create a balanced display with enough repetition for cohesion but also enough variety of shapes, sizes, and heights to create visual interest. 
 Before

After
 Side walls still looking a little plain, needs another element

Maybe a few more risers to create some more height

Here is a list of the changes and additions I made: 
  • All displays fit within the limited color palette of spring green, cream, beige, and black. I purchased linen-colored display components and painted my blue displays black. 
  • To make better use of the space and extend the color scheme, I covered the cork boards I had used in previous set-ups with cream colored linen-esque cloth to create hanging displays 
  • I also added a green and cream outdoor rug and a green and cream curtain to hang at the back of the booth. To me the rug is the thing that really marks out the space as your own and creates a welcoming atmosphere. I bought my rug on clearance but I have seen lots of tutorials on the internet for painting your own outdoor rug on the cheap. 
  • I pushed back the "counter" to create more room in the front of the tent for customers to stand and browse. This is a bit of a risky move with jewelry because it is hard to see from a distance. I hope to add some large images of my jewelry to hang on the booth walls to further enhance the display and draw in customers. 
Overall, the only new items I purchased for this makeover were the rug (on clearance) the curtain, and the beige displays. If I had more time on my hands I probably could have made more things myself and saved some money, but overall I didn't spend much over $100 on the whole makeover. As always it's a work in progress but I have gotten a lot of positive comments from both customers and other vendors so far! 

Friday, June 21, 2013

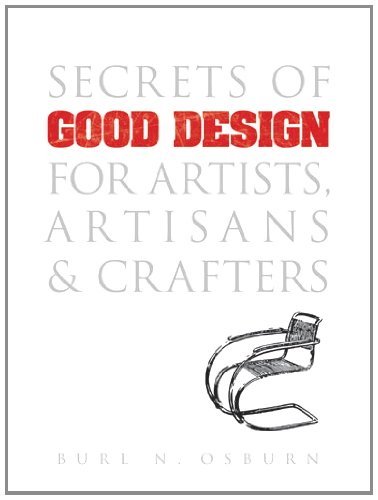
Books: Secrets of Good Design for Artists, Artisans, and Crafters


Here's an interesting book I picked up the other day: Secrets of Good Design for Artists, Artisans, and Crafters by Burl N. Osburn. It's one of those Dover re-prints of historical books (which I love, of course) This one in particular was originally published with the title Constructive Design in 1948. It's basically an instructional manual that covers design concepts and principles in a variety of media. What really makes this book unique is the abundance of useful illustrations and the tidy hand-written text. While this book is decidedly educational in purpose, it is more of a primer than a textbook. It is very short and to the point, focusing on fundamental guidelines for creating and appreciating good design. It even contains a section of practice exercises. While some of the objects and processes described in the book are now obsolete, most of the information in this book is still useful

Tuesday, April 2, 2013

Polymer Clay Explorations and New Jewelry

I've been dabbling a bit in polymer clay with the goal of making my own beads and having another way to add color to my jewelry (because I'm a jewelry control freak and I want to make everything myself!)  Now I know that there are REAL polymer clay artists out there making crazy amazing stuff, so don't scoff at my sad little beads, but I do like the color combination possibilities they open up.  Here are a few samples, soon to be available in my etsy shop! 


Monday, January 21, 2013

Etsy Shop is Open

Monday, January 7, 2013

A Jewelry Geek's Reading List: Victorian Jewelry Design by Charlotte Gere

Victorian Jewelry Design
 
I have a natural inclination to geekery.  I was a band geek in high school.  I like to watch Buffy the Vampire Slayer.  Now that jewelry making is one of my many jobs, I find myself descending further into jewelry geekery.  It started with reading "On Divers Arts" a medieval manual on metalsmithing and other arts by a monk named Theophilus.  Did you know if you keep a goat in a huge jar and feed it nothing but ferns, its urine will be ideal for quenching your metal?  Now you know. 
Anyway, I'm continuing my jewelry geek educaton by reading "Victorian Jewelry Design" by Charlotte Gere. For those of us interested in the history of jewelry design the Victorian era is an especially interesting period, when jewelry designers were inspired by a wide range of historical and archeological sources, and increases in mass-production significantly changed the way jewelry was made and sold.  Published in 1972, this book is text-heavy, with a decent number of illustrations in black and white.  Definitely for serious jewelry geeks only.

Friday, December 28, 2012

Art From the Heart Deadline Approaching!

Wisconsin crafters, there are still a few days left to apply for the Art From the Heart Valentine's Day craft fair to be held on Feb. 9th in Madison, WI!  More info an an online application form here

Tuesday, November 27, 2012

Holiday Shopping: New Items and Free Shipping!

Keep an eye out for new items in my artfire shop and at copperheartdesigns.com. I'll be adding new items every day. Use code JINGLEBELLS on artfire for free shipping now through Dec. 25th. Happy holiday shopping everyone!

Wednesday, November 14, 2012

Call for Vendors: Art From the Heart Valentine's Day craft fair

Hello all,
I'm pleased to announce that applications are open for Art From the Heart, a Valentine's day craft fair to be held at Union South on the UW-Madison campus on Saturday February 9th.  The fair will run from 10:00-5:00.  Booth fee is $50 and includes a 10' square booth space, meal card and parking.  We're looking for artists and crafters making unique and original work in any medium.  Apply online and join the fun! 

Monday, November 5, 2012

Artfire Shop Now Open!

Hi everybody!  I just started up a new Artfire shop.  Check it out at http://copperheartdesigns.artfire.com.  And, as always you can shop online on my website, http://copperheartdesigns.com.  I'll have lots of new items coming soon- just in time for holiday shopping! 

Wednesday, October 24, 2012

Upcoming Class: Custom Handmade Earrings


There's still time to sign up for for this great class!  Learn to make three different pairs of earrings using basic wireworking skills.  No jewelry-making experience required.  Open to UW-Madison students, faculty, and union members.  Not a union member?  Consider joining!

Wisconsin Union Mini-Courses: Custom Handmade Earrings
Learn how to make unique bead and wire earrings using basic forming and wire-wrapping techniques. Learn how to make your own ear wires too! Great for beginners.
Two Class Meetings:
Tuesdays Oct 30th and Nov 6th, 6:30pm-9:30pm
Union South
1308 W. Dayton St.
Madison, WI
Register Online

Monday, October 1, 2012

"Flash Jewelry" This Friday!


In the Madison, WI area and looking for something free crafty to do with your Friday night?  Come to Free Art Friday "Flash Jewelry" and make some quick, easy, and fabulous and free wire jewelry.  We will be offering two projects: a basic wire wrapped ring and a spiral-link bracelet.  The event runs from 5pm to Midnight, and I'll be there from 8pm to 10pm. We'll be in the Lakefront on Langdon in the Memorial Union (yes it's still open during renovation!) Did I mention it's free?